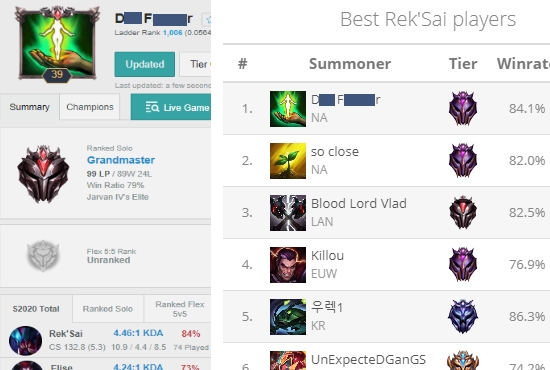
My name is Corso and I am a multi-season Challenger Jungle main. I have been actively boosting for 7 seasons, and coaching for over 4 years. Rek’sai is without a doubt my most played, and favorite champion in the game. I have attained Rank 1 Rek’sai according to League of Graphs multiple times over the past couple of seasons and have fully mastered the champion. I look forward to sharing with you what I know, in this comprehensive and detailed Rek’sai Champion Guide.
Rek’sai is an incredibly versatile, aggressive and efficient solo queue Jungle champion. Excelling at unique and unorthodox gank pathing and an aggressive play-style Rek’sai can be an absolute terror on the rift. Due to the nature of the champion, Rek’sai has plenty of unique build paths and can fill numerous roles on her team. She has always been considered a strong and proactive early-game champion that falls off horribly in the mid-game and late game. However, through thousands of games of experience, I can confidently tell you that Rek’sai is far from weak during these stages of the game. With the correct understanding of your role, effective build pathing, and a creative mind for finding picks and fights, Rek'sai can stay more than relevant throughout the course of the match. That is assuming you are unable to end the game pre-25 minutes which in almost every case is the goal.
Given her unique ability to burrow and utilize tremor sense, Rek’sai can be one of the hardest champions to pick up and become adjusted to. The general lack of vision means that you need to maintain an insanely good understanding of who the potential threats around you are. Keeping a mental note of all enemy champions who are visible on your map, to narrow down the potential targets who you are tracking in close proximity. Your spacing and distancing from opponents while burrowed can mean life or death, as a single well placed skillshot can result in you being picked off and killed. With that in mind, given Rek’sai’s play-style and kit, your ability to correctly space and engage on target is tied with your overall success. In 90% of cases, if you misjudge or mistime an E forward, or attempt to jump on a highly mobile target without the correct execution it can be a disaster. The ease at which you can be kited and punished for a poorly executed engagement is horrific, so spacing, timing and angles are EVERYTHING. That being said, make those engagements correctly and you will be dominating your opponents at every turn with this relentless Void Monster.
Let’s get into it!
The standard and currently best Rune Page available consists of the following.
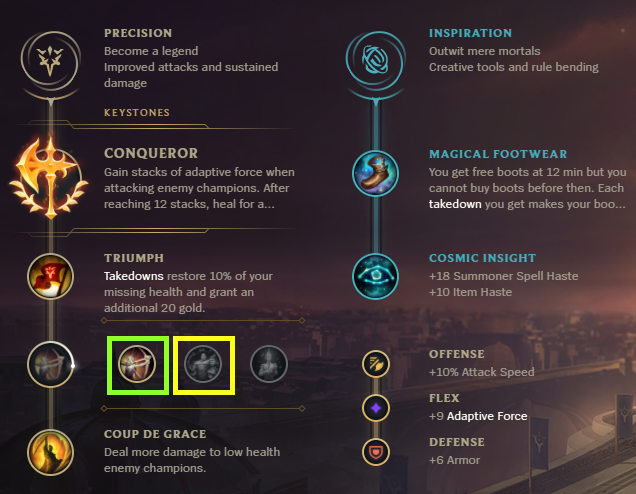
For the longest time, Hail of Blades (HoB) was commonly used on Rek’sai for one simple reason. To ensure that during a standard knock-up combo you could guarantee getting a full Fury bar to maximize your E damage. If played correctly, through the utilization of an auto-attack reset on your unburrowed Q, a full Fury bar can be obtained without Hail of Blades, leaving the Precision Tree and Conqueror to be the better option. Similarly, before the change to the current Rune system, the most common means to getting a full Fury bar during the combo was through the pre-updated Tiamat but that is a trick from seasons past that no longer works. Until Q auto attack reset was common knowledge, plenty of tricks through Rune or Itemization were used to try and maximize the damage potential from Rek’sai in an efficient manner.
Currently Conqueror provides excellent skirmishing, teamfighting and single target benefits for Rek’sa granting additional healing and damage - given the bruiser/assassin playstyle this is ideal. You are able to nearly instantly attain maximum Conqueror stacks during a correct engagement on an enemy player for a start. Triumph provides excellent additional healing during teamfighting and skirmishes, and pairs excellently with the commonly built Deaths Dance.
You also have the option between Legend: Alacrity and Legend: Tenacity on the precision rune page. This should be actively switched between depending on the team composition you are facing, and what boots will be the most optimal purchase. The additional Attack Speed is purely a nice bonus - but the added utility from Legend: Tenacity can be game changing, granting you additional base tenacity into some very heavy CC teams.
Coup De Grace pairs and feel excellent as well. Increasing the damage dealt by your executing ultimate, as well as maximizing damage while bursting squishy targets. Last Stand will rarely be activated correctly considering most burst engagements will have your target completely immobilized from start to finish, and your HP staying extremely high. It’s also important to note that due to the common build pathing I personally take for Rek’sai, it is likely that Cut Down will not provide as much additional damage as Coup De Grace will and therefore that is not selected often either.
I personally prefer utilizing Eclipse while playing Rek’sai, and I have grown a great disliking for the usage of Prowler’s Claw which I will explain in detail in the itemization portion of this guide. Regardless of the Mythic Itemization the Inspiration Tree holds many benefits that simply outweigh any other secondary tree options. The lowered cooldown on summoner spells from Cosmic Insight in game changing, the more often you have your smite and flash available to you the better. This leaves open significant windows of opportunity for Flash Engages or Ganks throughout the match on a much lower cooldown than your opponents will have.
Magical footwear is also worth its weight in gold - quite literally. If you are maintaining a strong early tempo and applying ample pressure during the early-game you should be receiving your boots on average around the 9-11 minute mark in the game. Rushing of your Mythic item is crucial, so spending the additional gold on even tier 1 boots becomes redundant in the early-game. Given your ability to perform very unorthodox and deep flanking ganks with the aid of your tunnels; combined with the bonus movement speed granted to Rek’sai while burrowed, picking up early boots is not necessary. Save your money and get your free boots!
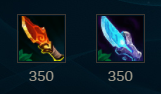
This becomes a very interesting option for smite selection. On one hand, Blue Smite provides excellent utility, and the small slow it provides allows for easy chase-down knockups on targets throughout the game. The damage however is negligible. With that in mind, I wholeheartedly feel that Blue Smite is nothing but a crutch for poor gameplay. Rek’sai has more than enough mobility and an outstanding gap closer through the use of her E to allow you to get onto targets, with or without Blue Smite. If you are unable to consistently find your way onto targets you are either engaging poorly, through the wrong angles, or are simply misjudging the situation entirely. Red Smite provides outstanding additional damage and works as a mini-exhaust reducing 20% of the damage from the target that you smite. The damage reduction from Red Smite alone turns the tides in most very difficult and close skirmishes, brawls and teamfights - it is game changing and something I can personally not play without.
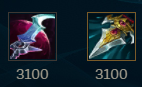
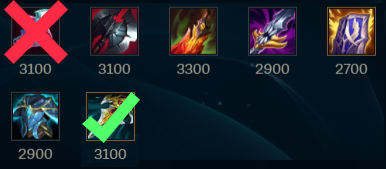
This is where everything gets quite interesting. As of a few months prior to Season 11 ending I have been strictly running Eclipse as a primary Mythic Item. Apart from a very few unique scenario’s I genuinely feel it is the best mythic without a doubt in my mind - let me explain.
Prior to the Item Overhaul and the massive itemization changes to League of Legends which added the Prowler’s Claw; Rek’sai was still my most played and effective Jungle champion for all uses. From Boosting at all ranks, to high winrate grinds, to maintaining and playing in Grandmaster and Challenger games. She at no point was reliant on the Prowler’s Claw active to close the gap or find engagements onto enemy players if played correctly. With the introduction of newer and far more mobile and slippery champions, alongside even more high mobility items closing the gap and getting onto carry champions has become harder and harder. I do see the value in both the additional damage, and the added mobility from Prowler’s but I think it does more harm than good.
Prowler’s without a doubt turns Rek’sai into a braindead point and click engage champion, allowing for sloppy flanks, and inaccurate tunnel placement but still rewarding you simply for being within proximity. This however does two things which can ultimately hurt you harder than it can help you. In the majority of scenarios that Prowler’s Claw is actively used I can guarantee that better tunnel placement, or a more coordinated engagement would have still resulted in you getting on target and killing your opponent with or without the active. With that in mind, Prowler’s is now turning Rek’sai into an even more predictable and linear champion. With Prowler’s claw it is obvious what your next move will be once you are within range of an opponent, and what direction you will be moving in. This can lead to an exceptionally easy time coordinating CC or damage towards you preventing you from being able to act on your engagement.
Against far more competent and faster reacting opponents, Prowler’s Claw can also be VERY easily flashed - not preventing your knock up but simply taking you farther away from your teammates and isolating you from allies.The problem with this is obvious. Between utilizing your burrowed E, a potential flash + getting kidnapped while activating Prowler’s Claw this will routinely leave you isolated and ultimately get you killed while facing more competent opponents.
Eclipse on the other hand does a number of VERY important things. Let’s start with the obvious being an insane 6% of your targets maximum HP being dealt after activation combined with a shield that scales off your base AD, and an additional movement speed bonus. For tank killing, skirmishing and burst damage nothing will compare. Play a single game using Eclipse and see how much shielding, healing and damage is racked up over the course of a match - it is truly staggering.
Eclipse gives you not only the mobility to chase down and kite opponents while fighting, but the survivability to fight and win matchups that you previously had ZERO business winning. It turns the tides into dozens of fights against Junglers, Assassins, Bruisers and Tanks that Rek’sai traditionally would have no ability to kill with or without prowlers, but also no ability to survive against in an extended fight. The value from Eclipse is two-fold. You now can no longer recklessly engage and find yourself baited, or suicide trading with Prowlers AND have the survivability and damage to win exchanges you previously could never even contemplate taking.
This adjustment in build path allows for a much more robust playstyle, while guaranteeing that you play a much more refined and accurate Rek’sai who is ruthlessly accurate with every engagement you take.
The Eclipse playstyle still packs a hefty punch, giving you MORE than enough damage to absolutely one shot squishier opponents, but also brawl it out with bruisers and tanks with ease. The flexibility of the build keeps you from falling off far earlier than the Lethality Prowler’s build, and in turn grants you a safer way of playing far more aggressively and as a frontline champion well into the late game.

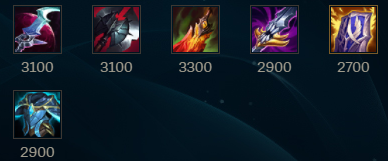
After the absolute demolition of Sterak’s I have always felt that Rek’sai was lacking some important early HP. After the completion of Eclipse your ability to burst and kill targets is outstanding. However in larger group skirmishes or into opponents that have better survivability you can often find yourself extremely squishy and easily punished for starting fights or looking for engagements around multiple opponents. Rek’sai can apply Black Cleaver stacks extremely well, and combined with the added mobility bonus your ability to kite or chase down targets is amplified even further with the movement speed bonus from Eclipse. The additional AD, CDR is simply a feel good bonus, whereas the HP components can be the difference between life or death in a lot of fights. All component pieces are extremely cheap, as BC consists of nothing but longswords and ruby crystals. Getting BC early gives you some significant bulk and it allows for continued aggression during the early/mid game stage of the match.

Even after the slight changes and nerfs to DD this item still feels fantastic, however it needs to be built when the time calls for it. Into mixed damage teams, or when you are not necessarily ahead the delayed incoming damage from Ignore Pain normally is not enough to prevent you from being instantly killed - that in combination with health regeneration only coming from successful kills often this purchase can feel lackluster. I often find Death’s Dance to be an excellent purchase if done after picking up Black Cleaver or another HP component item that will keep you alive long enough to reap the benefits of DD. That being said, this item can be game changing and instrumental in carrying games as it provides you with all of the necessary stats to frontline and carry teamfights as an aggressive bruiser. The best value from DD will come from an early purchase while facing AD heavy teams, however more conventional tank items such as Randuin’s Omen can be a much better replacement.

Maw can be one of the most game changing purchases into an extremely AP Heavy enemy team. This purchase combines outstanding damage components with unmatched survivability against AP burst and sustained damage. The icing on the top is the added sustainability from the Lifeline passive granting additional omnivamp. I would suggest purchasing Maw even as a second item if facing multiple significant AP threats. For example if facing an AP Mid + Jungle combination you will get massive value from this item. In similar games, you can often rush an early Maw followed immediately by a Force of Nature to become essentially unkillable - as you will have ample damage to kill your opponents simply from the damage components of Maw and your Eclipse. If trying to solo carry games after a strong early lead, Maw + Death’s Dance has proven to be a very versatile and successful combination giving you plenty of damage and survivability in teamfights while being far more forgiving than the standard Lethality build pathing of Prowler’s.

This item is BROKEN. Into even a standard team composition with multiple AD threats, purchasing a Randuin’s can be absolutely game changing. Components wise it provides excellent CDR, HP and Armor stats without even taking into consideration the full effects of the completed item. I will often purchase Randuin’s third after Eclipse and Black Cleaver, at this point in the game you have more than enough damage to kill any squishy target you get on top of, and the durability to grind down bruisers or tanks with ease. You are able to do this will fill a frontline and engaging role for your team with quite frankly zero regard for what your opponents are throwing at you. Upon a successful engagement, the active ability from Randuin’s will guarantee that no target is going to be able to run and escape from you and causes havoc in the enemies backline if you get a deep enough flank. It’s important to note that the damage reduction from both the passive and activation of Randuin’s is worth its weight in gold and multiplicatively stacks with Red Smite’s 20% damage reduction. This all but neuters enemy AD champions and buys you plenty of time to kill them regardless of how fed they are. Purchasing these defensive items while ahead allows you to play as recklessly as you want, with little to no chance of ever dying and giving shutdowns while still maintaining enough damage to quickly kill any target you jump on. While in an even game, or behind this will allow you to fill a crucial engaging role for your team buying them time and applying additional utility to help assist with kills.

Force of Nature after its return to the Rift has been a personal favorite item of mine for heavy Magic Resistance. Although the additional CDR and bonus Shielding/Lifesteal from Spirit Visage has its uses - as a primary MR tank item FON takes the cake. I will often purchase Force of Nature AND Maw of Malmortius into AP heavy team comps rendering them nearly useless. The overall damage reduction it provides from recurrent AP attacks stacks up incredibly quickly if you are the frontline engagement for your team. FON will provide you with the damage reduction needed to stay alive throughout an entire team, get your combo off and quickly escape utilizing the bonus movement speed it provides. If combined with Eclipse and Black Cleaver you will have an absurd amount of movement speed and be able to actively juke and dodge skillshots, chase down opponents with ease, or quickly escape from fights without issue. This item works wonders into champions that conventionally counter Rek’sai such as Karthus, and allow you to simply face tank multiple AP threats with zero regard for their damage. Similarly to Randuin’s Omen, I would pick up a FON as a third or fourth item when facing multiple AP threats, or simply round out a build with this as a final item if only facing one. Its utility is outstanding, especially against very slippery and annoying champions such as Zeri and Ezreal.
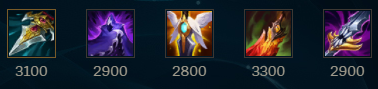
Prowler’s is the fast paced, assassin one shot style of Rek’sai everyone has grown to love. It has certain advantages and disadvantages compared to the standard Eclipse build I normally take advantage of, however I have found an interesting mix of the two that seems to make it a little bit more viable with some minor adjustments.

Since the release of Prowler’s and the resurgence of Rek’sai players taking advantage of the new items utility, I always found Edge of Night to be absolutely CRUCIAL for this build. The spellshield it provides is quite honestly the difference between you giving out the one shot, or receiving it. Given the aforementioned faults of Prowler’s it’s easy to see how diving head first into opponents especially those that are squishy can get you killed in a moment's notice. Edge of Night however provides you with a fighting chance and turns the tides in MANY unfavorable matchups. If you are able to close the gap onto any champion that only has a single form of CC to keep you off of them, now they are completely helpless. Champions such as Elise with conventionally counter Rek’sai rather well now have an extremely difficult time combatting her early engagements. Vayne as well is no longer able to condemn you away from her, making her an incredibly easy target - and the list goes on. EON gives you the safety and utility to make those riskier engagements without an immediate lockdown or impairment to punish you for your pick.

After a necessary early purchase of Edge of Night, you will be incredibly squishy and easy to kill even with a sizable lead. The general playstyle of Rek’sai at this point turns you into a kill trading monster, in most cases you can get onto a backline and instantly melt a target through a simple Prowler’s engagement, but then you will likely be left for dead with no chance of escaping. What can however be a deterrent to you being continually focused, or simply to stall out for your teammates to capitalize on your pick and protect you can be the respawn passive from Guardian Angel. This turns your 1 for 1 trades into 1 for 0 trades and can keep you in the fight a little bit longer.
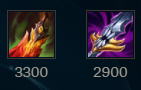
At this point the build can be rounded off, or have adjustments made to it to fit in both Death’s Dance and Maw of Malmortius. Quite often both end up being a necessity. You would be making these purchases for the same reasons as stated above for those items.
The conventional suicide Rek’sai build that consists of pure lethality and brute force kill trades to win out games is not something I think is a viable playstyle against competent opponents - nor is it a consistent way to play the champion. I stand by the viability of Eclipse but will occasionally stray away from it and run Prowler’s into insanely high mobility teams. The only time I see it as an advantage is against multiple champions I would otherwise have zero way of closing onto that will effectively limit my ability to play the game. Some examples being Lillia, Ezreal and Zeri to name a few. I would not however change the bulk of the build which opts into the standard Prowler’s > Edge of Night > GA. I would maintain the bruiser and tank build pathing and switch out only the Mythic in this situation.I feel like with enough practice against those champions, through a good utilization of flash and good approaching angles you can definitely do without the Prowler’s all together, but I know for some it has become such a crutch while playing the champion that it has become a necessity.

Rek’sai generates 25 fury from abilities and auto attacks on minions, monsters and enemy players. It’s important to note that your burrowed Q does NOT grant fury unless it is used on an enemy Champion. While Burrowed you will regenerate missing health and have your Fury drained. If your Fury bar is full, your E damage will be doubled and cast as True Damage.

This spell enhances her auto attacks, increasing their damage and dealing a smaller amount of AOE damage around your character. This is excellent for clearing Jungle camps efficiently. It is important to note that this spell is an AUTO ATTACK RESET. If used correctly it can enhance your damage significantly and increase the efficiency of your combos - this will be talked about in detail further into the guide.
This is a long ranged ability that fires a projectile at a high rate of speed, the first target hit will be marked granting vision on the target as well as allowing you to cast your ultimate if they are in range. This damage scales with AD and the skill is excellent for foraging and checking brushes while securing vision around objectives or invading. It is important to note that the vision granted from landing your Q on an enemy player is basic. It is NOT True Vision. Champions that are stealthed such as Twitch, Vayne during her Ultimate, Rengar in his Ultimate, Senna W etc will remain fully stealthed but will still receive damage.

While burrowed, Rek'sai is not underground and has access to her secondary set of skills. Your vision is massively reduced but you are granted Tremor Sense. This turns you into a little rift submarine, seeing the movement of anyone in your proximity including minions, jungle camps and enemy champions. While burrowed you are granted additional movement speed and this should be used while traveling around the map as much as possible. Any vision granted by your teammates, minions or wards will grant you normal vision of that area - any upon reaching melee range of whatever your intended target is you will also gain vision of that.
Un-burrowing allows you to knock up and displace your opponents. There is a knock up debuff timer, meaning you can not spam knockup the same target multiple times in quick succession. You will see a small ring around enemy players who have been knocked up identifying when they are susceptible for a second time. It is important to note that if you un-burrow below multiple targets, the innermost target will be knocked up and the rest will only be momentarily displaced. Meaning those other targets can still be knocked up shortly after. This can be best tested and understood while clearing the raptor camp.
NOTE: Please take time to check the Rek’sai Combos and Tips and Tricks section of the guide for a better understanding of how to properly utilize Rek’sai W.

Furious Bite is a high damaging, tank shredding and burst damage ability. This should ONLY be cast once you have reached maximum Fury as that will ensure the damage is doubled and that it is applied as True Damage. It is important to note that during a standard Rek’sai combo, if you finish with your E prior to ulting, if a target flashes, dashes or jumps away as you cast the ability the damage will still be applied.

The Tunnel ability of Rek’sai is the cornerstone of the champion's ability to be as proactive and effective on the map as she is. Your tunnel allows you to bypass walls, barriers and any terrain that is in your path giving you some very unorthodox and creative methods of making ganks work, and finding engaging opportunities. Once placed, your burrows CAN be reused as long as they don’t time out and your opponents have not broken them. You are allowed 8 burrows at any given time, and they will remain on the map for 10 minutes upon creation.
You can not use a created burrow while stunned, displaced, silenced or CC’d. BUT if you cast your burrow prior to being hit by the vast majority of CC you will be able to travel the distance of the tunnel and still escape, often timing out the CC by the time you reach the other end of it. I’m unsure if this is a long recurrent bug or intended game design, but take advantage of it how you will.
Burrows can often lengthen farther than the intended distance if going over certain walls, or short-stop you on others. It can be a bit frustrating from time to time but you will quickly learn which areas cause problems and which do not. You can be stunned and displaced while traveling through a burrow so keep that in mind while trying to engage. It is a very easy skill to predict and pre-aim CC towards enemy players.

Rek’sai’s ultimate ability is a high damage, percentage of missing HP execute skill. This can ONLY be cast if your target is marked with the passive: Marked As Prey which will be indicated by a small symbol over their head. This mark can be applied by Rek’sai dealing ANY form of damage on her opponent including Blue Smite. This mark lasts for 5 seconds. While Void Rush is cast, Rek’sai becomes untargetable but not unkillable. If you have Red Buff, Ignite or any DOT burns applied to you it is possible to die while in your ultimate. That being said, it’s common that upon landing if there are any AOE or Inbound abilities Rek’sai can often receive that damage prior to her Ultimate dealing damage and die mid-air. Champion abilities such as Viktor E, Graves Q can kill you as you are ultimating towards those characters as a few examples.
Void rush will follow targets no matter how or where they move. A leblanc jumping back and force from her W or someone taking a Thresh lantern across the map will not save them from this execution.
This is by far the make or break for an effective and efficient Rek’sai player. If you are unable to consistently and precisely utilize this combo while ganking, making picks or simply any skirmish through your match you are not playing the champion to its fullest potential. Utilizing the auto attack reset from your Q is going to be the difference between winning or losing nearly a dozen lvl 3-4 Jungle 1v1 matchups.
Upon correctly gauging the distance for your Tunnel and getting underneath a target you want to start with applying your Burrowed Q: Prey Seeker. This can be done prior to tunneling onto the target for vision (not recommended for ganks or flanks as it will give away your position) So alternatively you can cast this immediately prior to unburrowing under your target. If you are concerned about a fast reaction time from your opponent skip this portion of the combo.
You then need to MANUALLY unburrow, I can not stress this enough for multiple reasons as will be discussed later on in this guide, followed by an auto-attack, instantly activating your Queen’s Wrath (Q) to reset it - applying enough damage to receive a full stack of Fury and then activating your Furious Wrath (E). At this point your target will no longer be displaced and be able to Flash/Dash/Gap Close away in which case you can either flash to follow them or cast your Void Rush to execute the target.
Burrow Under Target > Q > Manual Unburrow > Auto > Q > Auto > E > Chase or Ult
Here below is a demonstration of both the correct way to utilize the combo, and the incorrect way without utilizing your auto-attack reset. The difference in damage output is staggering. Both clips use 3 auto attacks in total and start with 0 Fury.
Incorrect Combo Not Utilizing Auto Attack Reset or Burrowed Q
Correct Combo Maximizing Damage Output
This can be quite the controversial opinion but I have ALWAYS preferred and strongly feel that manually unburrowing, although it leaves room for personal error, maximizes the performance on Rek’sai by a considerable margin.
As you will be able to see in the following clips, if you click to auto-attack a target while burrowed it will move you into auto attack range and knock the target up. That range however is slightly smaller than the actual range to knock-up a target if you manually unburrow. For this reason I have always preferred the manual unburrow. WIth that being said, in a very fast paced engage or E into Flash if your opponent reacts quickly they can often flash or dash prior to you being able to auto and unburrow. Manually unburrowing guarantees that the knockup is instant and no opportunity is missed.
The first unburrow is manual, the second is via auto attack. The difference might be small, but it can be game changing when applied in-game. Every character model hitbox is different per champion, some knockups can be done at an obsurd range.
This has to be one of the most valuable tricks you can learn while playing Rek’sai. Due to the versatile and unorthodox routes you can create for yourself using Tunnel, you have the ability to enact deep flanking ganks which if executed correctly can burn your opponents flash but save your own.
When you are able to fully get behind your opponent, simply keep a small gap between you and their character model. Holding your unburrow as long as possible will force them to inevitably flash, but if you space correctly they will still be within your knockup range and you will not even be required to flash after this.
As you can see in the clip below, after identifying a gank opportunity the angle of approach is key. This gank could have been executed by sheer brute force, trading flashes with the enemy bot lane however it is not necessary. With the correct spacing, a flash can be forced and the kill still secured with ease.
Level 3 Bot Lane Gank - Flash Forced Via Spacing + Re-Gank On Burrow
This may seem rather gimmicky, or that it only works against less experienced or lower ranked players. This however is false, the number of times you will be able to utilize your burrows directly after a gank against laners who are trying to clear them out of the lane is quite staggering. Many players simply do not understand or recognize the cooldown for re-using a burrow, or simply don’t expect you to invest the time to wait and try and punish them while it is cleared out.
As you can see in the clip above, this is a textbook execution of a repeat burrow kill after a successful gank.
Due to the extremely long cooldown of your E, utilizing them to maximize clear speed and Jungle movement can be a tricky balance. I would highly suggest that during volatile games, or when clearing camps such as Raptors, Gromp or Krugs you refrain from tunneling prior to reaching them. In the event that a gank takes place, or a gank becomes viable in those nearby lanes having your E on cooldown is the difference between success or not in the majority of cases. It’s better to stay ready. Unless you can be absolutely certain that you will not be needed on the map during your E cooldown, then you can begin building a tunnel network to expedite Jungle movement.
Playing with your audio on is absolutely crucial. Your W Tremor radius is massive and can not always be seen on the very edges depending on where you are focused. A new enemy champion approaching your proximity will trigger a sound effect indicating if someone is on the out reaches of your Tremor Sense. It is highly advised to play with your audio on loud enough for you to hear this.
As demonstrated in the clip below, Rek’sai Unburrow can be utilized to interupt and cancel dozens of dashes and jumps. This can be absolutely game changing when used during ganks, flanks or to prevent engages. Some of the most common uses during ganks are against Tristana, Yasuo, Samira, Gnar, Corki and Fizz to name a few. When it comes to preventing engages from enemy players, you can interupt Rengar, Kha’zix, Zac, Talon and Diana engages with ease. This can also be an outstanding tool when skirmishing with champions such as Lee Sin whom you can interupt both his Q and W dashes.
I would add that during your initial clear it is paramount that you are actively looking and identifying locations that the enemy laners are likely to have warded. This can be game changing when it comes to selecting your route and looking to execute your ganks.
I would not necessarily consider Rek’sai a feast or famine style jungler, but it undoubtedly works to your favor to excessively abuse your early-game prowess. Unless presented with zero opportunities to impact and pressure the map I highly prioritize ganking and lane pressure over passively farming. The later the game goes, the less impact you will have. I will happily give up CS in the early game if it means accumulating a lead for my laners, you can operate on low income and will inevitably scale worse than most of your laners. Giving them an early lead will always translate well. With that in mind, you will often find with an aggressive early-game style of gameplay that you will fall behind in CS. This is normal and in the majority of cases whatever CS discrepancy you have between you and the enemy Jungler, will be reflected in the CS leads your laners have over their respective opponents.
You can then utilize the leads you have given your laners in the early-game and pressure into the enemy Jungle, denying camps. This will ultimately begin closing that CS deficit you previously had up rather early on in the game. I find this strategy works a vast majority of the time, but can backfire if your teammates are unable to work with the leads they are given.
Rek’sai has a multitude of options when it comes to her early Jungle clear, you are more than capble of full clearing - however this is not something I would recommend if you can identify opportunities for ganks in your games.
The following are some fast early clears you can look to do to set yourself up for some fast level 3 ganks.
Red > Gromp > Blue
Blue > Gromp > Red
Red > Raptors > Gromp
Red > Golems > Raptors
Blue > Gromp > Wolves
All 6 of these possible variations come with their pros and cons. They all provide an extremely quick level 3 to allow you to begin impacting the map immediately. Some can give you fairly unorthodox and hard to track gank timers, and other can minimize or actually increase the liklihood that you will be invaded or punished for an early gank. Everything is situational.
My personal favorite route conists of a full Red Side clear. This allows for the possibility to gank on the same side of the map you recieved your leash from - immediately recall for a multiple longsword purchase and in the majority of cases be able to respond to your Blue side Jungle being invaded.
Below is the most efficient method of clearing your Red Side Jungle:
Important Notes:
Auto Reset Utilizing your Q is vital for the speed of this clear.
The Burrowed Q to pull Krugs can be done from the rear of the camp, not the front to pull them even faster.
Maximizing the damage from your burrowed Q + knockup on AOE is vital. See placement for unburrow and burrowed Q for Raptors and Krugs execution.
Switching auto attack target to apply red buff damage, and finishing small raptors and krugs via AOE and burn is crucial.
Traditionally kiting your camps to the next location you want to travel in saves valuable time, however if you are maximizing your AOE damage minimal kiting is required to speed up this clear method.
In a general sense, there are only three reasons you DO NOT want to be playing Rek’sai.
The first is when you have a team composition that has little to no gank set-up or earlygame priority. You thrive on an aggressive earlygame playstyle and capitalizing on your advantage during this stage is sometimes only possible if you have teammates who can help coordinate ganks and skirmishes. If you see that your team is picking champions with minimal utility that require extensive scaling - who will look to play a slow paced and inactive earlygame Rek’sai most definitely will struggle to make anything happen.
Secondly, certainly Jungle on Jungle matchups can prove to be nearly unplayable for Rek’sai completely shutting out your ability to perform earlygame. Champions such as Elise, Nidalee, Rengar, Taliyah and Kindred can be a complete nuisance and are mobile enough to invade and punish you at will. With regards to overall playstyle, other champions that don’t necessarily counter Rek’sai directly but can power farm and outscale her with little to no risk of being punished can also be a huge concern. Champions such as Udyr, Karthus and Olaf come to mind. They have extremely efficient clears and are able to either trade 1 for 1 with Rek’sai during invades or simply evade the deaths all together. If given the ability to power farm and out scale her they can completely take over a game.

The third situation is against either highly mobile teams, or extremely heavy CC based teams. Against multiple targets that can easily evade and avoid your engages and ganks you will struggle to find picks or leads without the aide of your teammates. Additionally, facing extremely heavy and easily executable CC based teams you can be shut down all the same. Although creative build pathing can allow for some wiggle room in these matchups it can still be extremely tough to play against.

I personally pick Rek’sai into nearly any matchup or team composition regardless of the scenario and although some games can have you feeling extremely restricted it is still possible to have some considerable impact.
To conclude this guide, I want to start by saying that I feel the strengths of Rek’sai come purely from the versaility she has to pressure the map early on, and create plays for her team. This champion is truly a jack of all trades. You have the ability to engage, peel, pick and assassinate your opponents while being able to deviate your build path to effective enhance your performance from game to game.
The cornerstone to success on Rek’sai is a precise and calculated approach to teamfighting and ganking, your judgement on spacing and tunnel usage is CRUCIAL. If you make even the slightest miscalculation you will be dead in the water and kited out with ease. The same goes for fights and skirmishes, if you are not able to utilize the champions full damage potential with the correct damage combo you will be dealing roughly 30% less damage on enemy target. This can be the difference between success and failure.
I would highly encourage each and every one of you to give Rek’sai a try and I wish you the best of luck! I hope this guide has served you well.